Please ensure Javascript is enabled for purposes of website accessibility

TruFire Features

WHEN WE ENGINEER A PRODUCT…

Here a just a few reasons why more archers across the world use Tru-Fire releases than any other release.

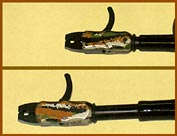
When Tru-Fire designs a new product, we want to make certain it gives you, the consumer, years of trouble-free use and dependability. One of the first issues we address is using the same material on the internal firing mechanism. This is important because when different metals with different hardnesses are combined in a firing mechanism, premature wear can and often times will occur. Be careful, other release companies firing mechanisms are made from different metals altogether. Tru-Fire, on the other hand, designs firing mechanisms to utilize the same metal and hardness on all of our release firing components.

Take the example to the right, which is a current Hurricane design. The jaws, represented by the yellow color, are made of the same metal as the roller, colored red. Both the jaws and roller are then heat treated at the same Rockwell hardness so you can rely on years of extreme use without failures.

TRU-ROTATION

The truth about 360 degree rotation: Many release companies say they have 360 degree rotation. What these companies are not telling you is the rotation is between the body of the release and the strap, which is virtually useless. At full draw with a release that rotates between the body and strap, if you rotate your wrist, you will not be able to reach your trigger because the trigger is still parallel to the ground. Our patented 360 line of releases has a head and body that are independent of each other. This means you get full rotation in front of the body, not behind. Look for yourself, if your release has jaws and a trigger located in the same body or component, then your release is not a Tru-Rotater.

For a release to have Tru torque free rotation, the head of the release (where the jaws are located) and the body of the release (where the trigger is located) must be two separate components. To be truly torque free, the head of your release where the jaws are housed should be able to rotate independently of the body. Take a look at our 360 line of releases to see the only Tru-rotating wrist models on the market. Note: Tru-Rotation is an extremely important feature when your release is directly attached to your bow’s serving.

LENGTH ADJUSTMENT — without tools!

If you want the finest, most precise length adjustment system in the industry – you’ve found it. Our system is able to adjust the length between the trigger and the strap by over 1″. Within that inch there are 32 different length positions you can set. All this is done without the use of a tool. Just turn the head of the release or the black barrel behind the head and you are set. It’s that simple. Length adjustment is important for proper index finger placement on your trigger. If your release is to long and you are reaching for the trigger, target panic can set in. Another situation is if you put a glove on under your release. Because of the thickness of the glove the trigger will now be to close to the strap. With our system, just turn the head and your adjustment is made.

TRU-FIRE EVOLUTION BUCKLE STRAP

Our Evolution buckle strap proves once again why we are the leaders of the release industry. Innovation, quality, craftsmanship all rolled up into one!

What are the two most common complaints with the buckle straps on the market today?

1. Difficult to put on.

Nobody wants to fumble around in the dark, trying to get their strap on while 20 feet up in their tree.

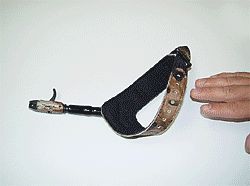
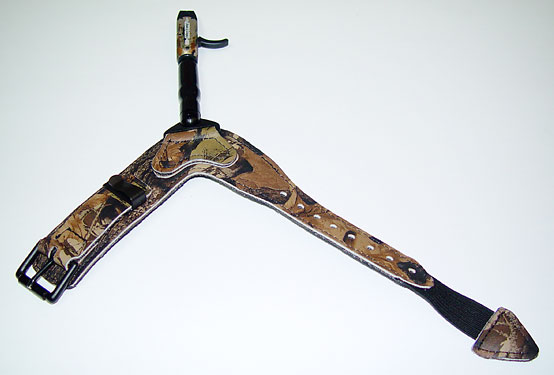
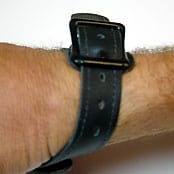
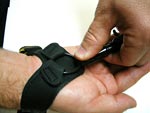
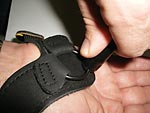
In the relaxed state, our strap looks similar to others on the market except for our patent pending “arrow head”.

But you won’t want to have it the relaxed state, you want it in the ready state. Ready to go onto your wrist in a second.

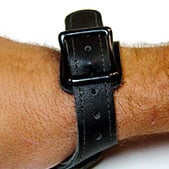
With our new design you will never have to fumble to get the end of your strap through the buckle because it already is through the buckle via our “arrow head”. There is no need to ever have to pull the arrow head out of the buckle. It works great with or without gloves.

2. Tons of stretch in the strap while drawing your bow.

Buckle straps are supposed to promote exact strap location on your wrist every time. What good is a buckle strap that stretches while you shoot it.

No pressure applied to the strap. Holes are circular.

Pressure applied to the strap.
Notice the holes being elongated, this means your strap is stretching. This makes it difficult for an exact anchor point location.


Unlike other buckle straps on the market, we go the extra mile by having a piece of ballistic material layered between the leather portion of the strap and the padded material. This material keeps any stretching while drawing your bow, near zero.

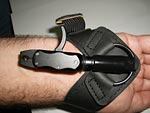
Our strap attachment also allows the head to pivot left and right and also fall away.

Buckle Foldback

How many times have you had your release hit your ladder stand as you climb up it early in the morning?
While your rattling, aren’t you tired of your release flopping all over?

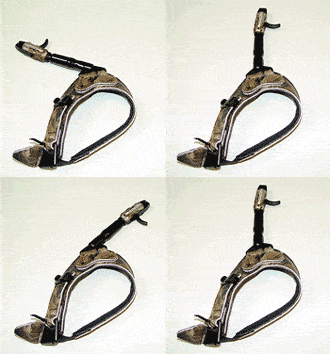
Time and time again, your release seems to get in the way at the wrong time — not anymore!!! Our new Buckle Foldback system is simple yet it gets the job done. It takes just 1 lb. of pressure to put the release in the stowed position and only 1 lb. of pressure to get it back to the shooting position.

Unlike other buckle straps on the market, we go the extra mile by having a piece of ballistic material layered between the leather portion of the strap and the padded material. This material keeps any stretching while drawing your bow, near zero.

Our strap attachment also allows the head to pivot left and right and also fall away.

WE GO THE EXTRA MILE FOR RESEARCH & DEVELOPMENT

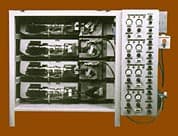
When we say that our releases can handle excessive amounts of weight and years of use, we can actually prove it! With our exclusively designed release tester, we can automatically load onto the release, rotate the head (if applicable), apply pressure and fire the trigger in mere seconds, via pneumatics. During the development of a new release, we test the new model at a staggering 200 pounds for 20,000 continuous cycles. By testing our products at this extreme level of weight and cycles, we are insured that you the consumer will have a release that will not fail you.

Our quality is what we live by!

Frequently Asked Questions

Does my archery release have true 360 degree rotation?

A. If both the jaws and trigger of your archery release is housed in one component or body, then your release is not a “tru rotater”. For a release to have tru torque free rotation, the head of the release (where the jaws are located) and the body of the release (where the trigger is located) must be two separate components. To be truly torque free, the head of your archery release where the jaws are housed should be able to rotate independently of the body. Take a look at our Classic Caliper line to see the only tru-rotating wrist models on the market.

Do I need a tru-rotating release if I shoot off of a string loop?

A. No you do not. While at full draw, if you torque your wrist either left or right slightly, your string loop will take up the torque transmitting only a small amount of torque to your bowstring.

My bowhunting release seems to have a lot of travel, can I adjust this out.

A. Yes. All of our bowhunting releases are adjustable for trigger travel. On the majority of our releases, this adjustment can be found on the trigger via a set screw. If you cannot locate a set screw on the trigger, please e-mail us with your model and we will get your instructions mailed to you.

Release Adjustment Instructions

Release Trigger Travel Adjustment

IMPORTANT:
After you adjust your release, we recommend that you test your releases new adjustment position on something other than your bow. Try using an old bowstring, coated cable, even a shoelace.  Use something that you can apply as much pressure as your bow’s draw weight.   Never draw any release back directly toward your face in the event of an accidental firing of the trigger.   Make sure to have an arrow in your bow when drawing back and the target merely feet in front of you so you have a sufficient backstop.  Failure to follow these precautions could result in injury to  you or someone else.

HARDCORE 4 FINGER

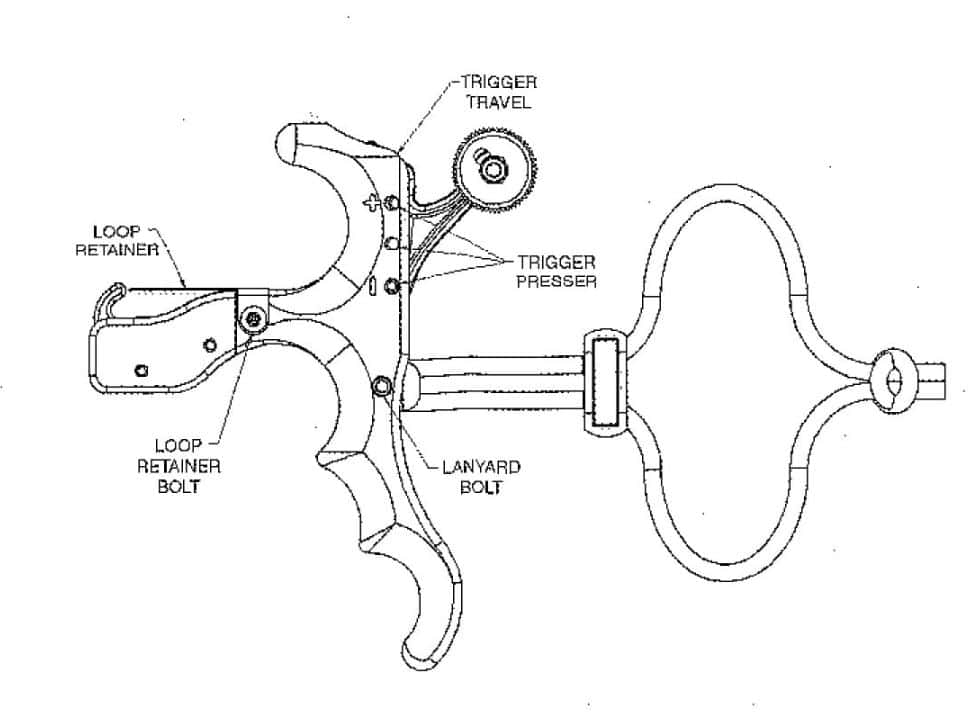
This release has separate trigger travel and trigger pressure adjustments (see attached pic).  The trigger travel adjustment is located via a 1/16 set screw on the handle up near the thumb knob.  Turning this set screw into the handle (clockwise) decreases trigger travel (less travel before it fires) or turning the set screw out (counter clockwise) increases trigger travel.

The second adjustment is trigger tension.  Where the trigger comes out of the handle you will see three threaded holes on one side of the handle.  The release will be set at its lightest tension via the screw located in the hole closest to the – minus sign.  This hole location will be around 6 ounces, middle hole 24 ounces and the last hole (+) is around 50 ounces.  To increase from the 6 ounce position to the 24 ounce position simply remove the screw from the original position and screw it into the middle hole.  IMPORTANT: Once you remove the screw from the original hole you will have to re-adjust your trigger travel (set screw located on the handle).  In fact when you move the screw to the heaviest position you will first have to back the trigger travel set screw out of the handle so the screw has clearance to go thru the trigger.  Once you have changed the trigger tension screw make sure to pull test the release on something other than your bow to confirm that it will hold your bows weight. For more detailed instructions, click here.

HARDCORE MAX

The Hardcore Max has same trigger travel adjustment as standard Hardcore.  The Hardcore MAX has a separate trigger pressure adjustment located in the housing approx. 1⁄4” below the actual trigger.  This adjustment is an actual bolt that takes a 5/64” allen wrench. When the bolt is flush with the housing, the trigger is at its lightest which is around 4-6 ounces.  Turning the bolt into the housing will increase trigger pressure.  Turning it all the way will increase trigger pressure to 20-25 ounces.  You may adjust this pressure anywhere in between.  IMPORTANT: if the bolt is screwed in more than two full turns past being flush with the housing, the jaw may not auto reset.  If it does not auto reset simply pull back on the trigger to reset jaw.

HARDCORE

Focus your attention on the set screw located on the trigger (directly under the jaw). Use a 1/16th allen wrench to make your adjustments. To decrease trigger travel, turn the set screw clockwise which will turn the set screw into the trigger. To increase trigger travel, turn the set screw counter clockwise which will move the set screw out of the trigger. Make sure and only move the set screw ¼ turn at a time and test the travel on something other than your bow (old bowstring, rope, etc).

EDGE RELEASES

Focus your attention on the set screw located on the trigger (you may have to pull the trigger down to see it). Use a 1/16th allen wrench to make your adjustments. To decrease trigger travel, turn the set screw counter clockwise which will bring the set screw out of the trigger. To increase trigger travel, turn the set screw clockwise which will move the set screw into the trigger. Make sure and only move the set screw ¼ turn at a time and test the travel on something other than your bow (old bowstring, rope, etc).

360 RELEASES

Underneath the trigger in the slot of the body you will see a nickel plated round part.  While looking at this part, turn the head of the release.  What you are trying to see on the part is a set screw.  This set screw is 1/16th in size.  Once you locate the set screw on the nickel plated part, go ahead and un-loosen the set screw by turning it counter clockwise only 1/4 turn of the allen wrench.  This is important:  make sure you leave the allen wrench in the set screw — if you want more travel (not as sensitive), turn the head of the release counter clockwise (have the head pointed at you).  Try only turning the head of the release ¼ turn at a time (remember, the allen wrench still must be in the set screw).  After you have turned the head the 1/4 turn, then tighten the set screw back up on the silver part.  If you want the trigger to have less travel, you would have turned the head clockwise.

Trigger tension adjustment:

Take your release in your hand with the head pointed away from you.  Turn the tension dial to the right or clockwise to decrease trigger tension.  Turn the tension dial to the left or counter clockwise to increase the trigger tension.  THIS DIAL DOES NOT ADJUST TRIGGER TRAVEL BUT TRIGGER PRESSURE ONLY.

HURRICANE, TEAM REALTREE, MOSSY OAK

Locate the set screw on the trigger.   Using a 1/16th allen wrench, turning the set screw out or counter clockwise will decrease trigger travel.  Turning the set screw into the trigger or clockwise will increase trigger travel.   Make sure and move the set screw only ¼ turns at a time.

X-CALIPER, PATRIOT, SUREFIRE, X-CALIPER GLOVE

The X-Caliper has a 1/16th set screw located on the trigger.  If you want less travel, rotate the set screw clockwise.  If you want more travel, rotate the set screw counter clockwise.  Make sure and move the set screw only ¼ turns at a time.

EDGE 4 FINGER, 3D HUNTER & STALKER 3 FINGER

There is a round nickel plated knob on the bottom of the handle (under the Tru-Fire logo).  STEP 1)  While turning the head of the release, look at the side of the knob and you will see a set screw ( when you turn the head, this knob should rotate).  STEP 2)  Put a 1/16″ allen wrench in the set screw and unloosen only ¼ turn.  STEP 3)  Keeping the
allen wrench in the set screw, turn the head of the release clockwise (HAVE HEAD OF RELEASE POINTING AT YOU) for less travel or counter clockwise for more trigger travel.  IMPORTANT:  Remember, clockwise of the head is less travel, counter clockwise is more travel.  STEP 4)  We suggest that you only move the head 1/8 turn at a time for adjustment.  STEP 5)  You should then tighten up the set screw and test the release.  The set screw that is located on the handle, (near the neck of the handle) is there if you want to lock the head from rotating.  You may want to use this feature if you are using a string loop. Do not over-tighten this set screw.

Stalker 3 Finger “push / pull” instructions:  On the back of the handle are two holes labeled “push” and “pull”.  When the screw is in the push hole, this means the trigger can only be fired by pushing the trigger.  When the screw is in the pull hole, the trigger can only be fired by pulling the trigger.  IMPORTANT:  going from push to pull or pull to push will require you to have to re-adjust the trigger travel.

BULLDOG

Locate the set screw on the trigger.  Using a 1/16th allen wrench, turning the set screw out or counter clockwise will decrease trigger travel.  Turning the set screw into the trigger or clockwise will increase trigger travel.   Make sure and move the set screw only ¼ turns at a time.

JUDGE RELEASES

Trigger travel adjustment:  Locate the adjustment screw located underneath the trigger nearest the head by pulling back the trigger.  Take 1/16th allen wrench and place allen wrench into the set screw and turn to the right or clockwise to increase trigger travel or to the left or counter clockwise to decrease trigger travel.  CAUTION:  this is a very sensitive adjustment, one complete turn of the allen wrench can take the release from full travel to not being able to hold the string.

Trigger Tension:  Take the release in your hand, head pointed away from you, with one hand hold the rubber tubing and with the other turn the tension dial to the right or clockwise to increase trigger tension.  Turn the tension dial to the left or counter clockwise to decrease the trigger tension.

Free 1-Year Data Subscription

with Every wc20 Purchase

Can’t be comibined with other offers